Getting Started with Kindo
Kindo enables professionals on SecOps, DevOps, and platform engineering teams to automate challenging and tedious tasks from their playbooks and runbooks using AI agents. This guide walks you through signing in and navigating the interface.
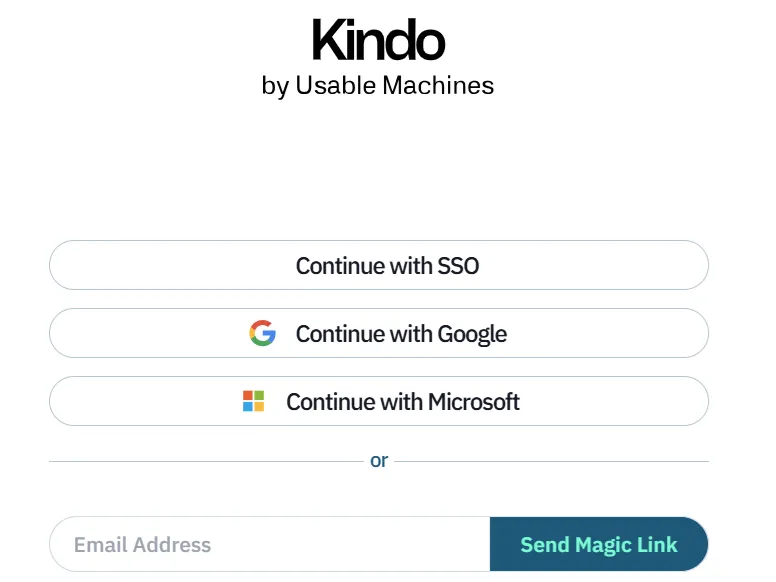
Signing In
-
In a browser, navigate to your Kindo instance (e.g.,
app.kindo.aifor SaaS). -
Choose your sign-in method (SSO, Google, Microsoft, or Magic Link).
-
You arrive at the Kindo Terminal — the main workspace.
The Terminal
After signing in, you arrive at the Terminal window with the query box at the bottom. This is the default screen and the primary workspace for interacting with AI models.
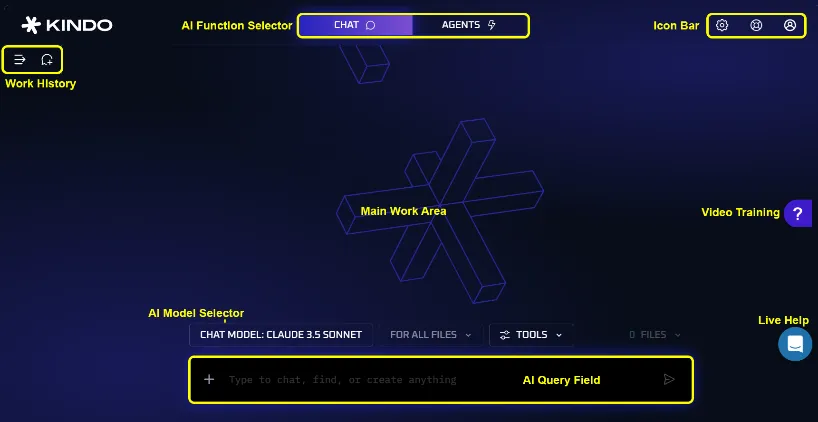
From here you can:
- Select an AI model and run queries as a Chat
- Navigate to the Agents tab to manage and execute agents
Chat Window
Selecting a Model
Above the query bar is a model selector where you can choose from available LLMs. Models are organized into categories:
- General Purpose — Versatile models for most tasks
- Longer Context — Models optimized for large inputs
- Reasoning — Models specialized in complex analysis
- Cybersecurity Focused — Models tuned for security operations
Running a Query
Type a question in natural language in the query bar and press Enter. The response appears in the main work area.
Attaching Files
Click the + button to attach files to your query. Once files are attached, you can:

- Remove files using the Files panel
- When multiple files are attached, use For All Files to apply a condition collectively or to each file independently
Tools
Enable additional data sources for your query:
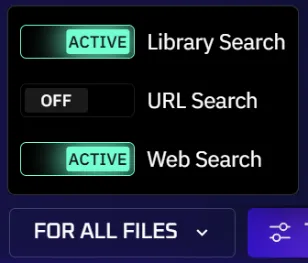
- Library Search — Connect to files in your knowledge store
- URL Search — Connect to a specific web URL
- Web Search — Search the internet for additional context
Work History
Use the history panel to:
- History — Review queries from the last 5 days, filtered by your own or shared queries
- Agents Run — Review agent executions, filtered by type (Chatbot, Workflow, Trigger)
Agents Window
The Agents screen lets you create, edit, and deploy AI agents that automate repeatable operations.
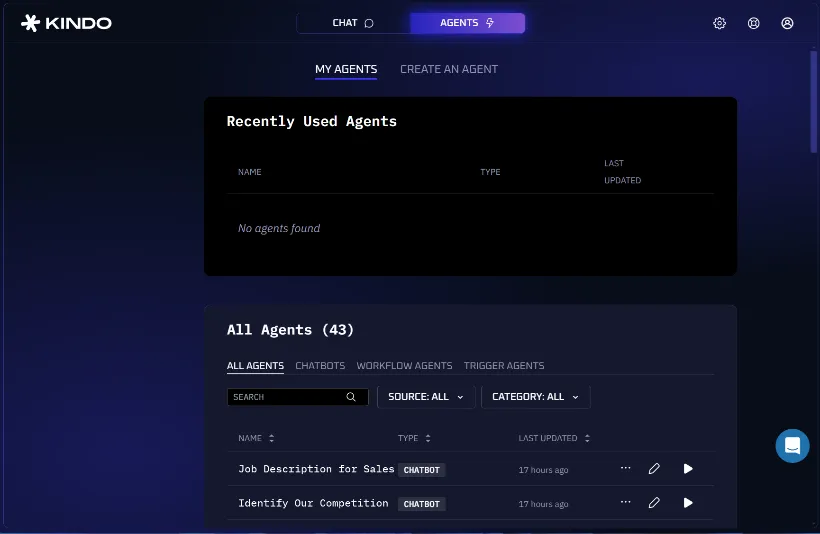
My Agents
View all your agents filtered by type:
- All Agents — Every available agent
- Chatbots — Query-based agents
- Workflow Agents — Process automation agents
- Trigger Agents — Event-driven agents
Each agent can be shared, deleted, edited, or run directly from this screen.
Creating an Agent
Select Create an Agent to build a new agent. Choose from three types:
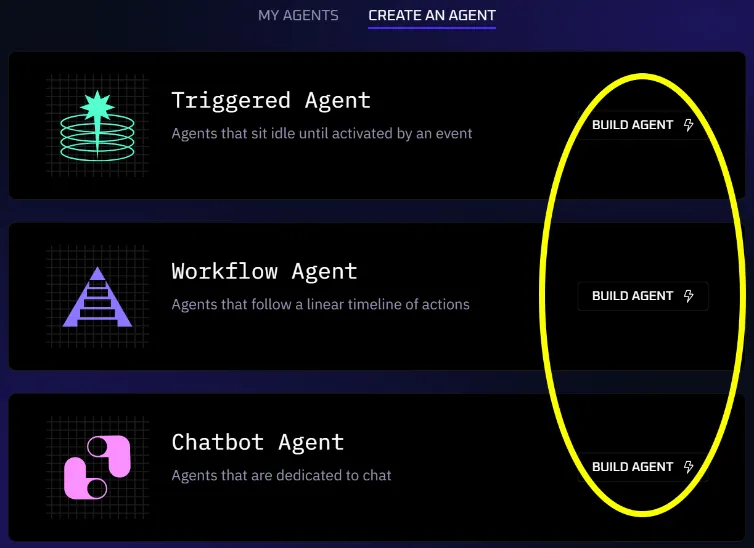
- Triggered — Reacts to events in integrated systems
- Workflow — Executes a defined sequence of operations
- Chatbot — Responds to user queries using knowledge bases
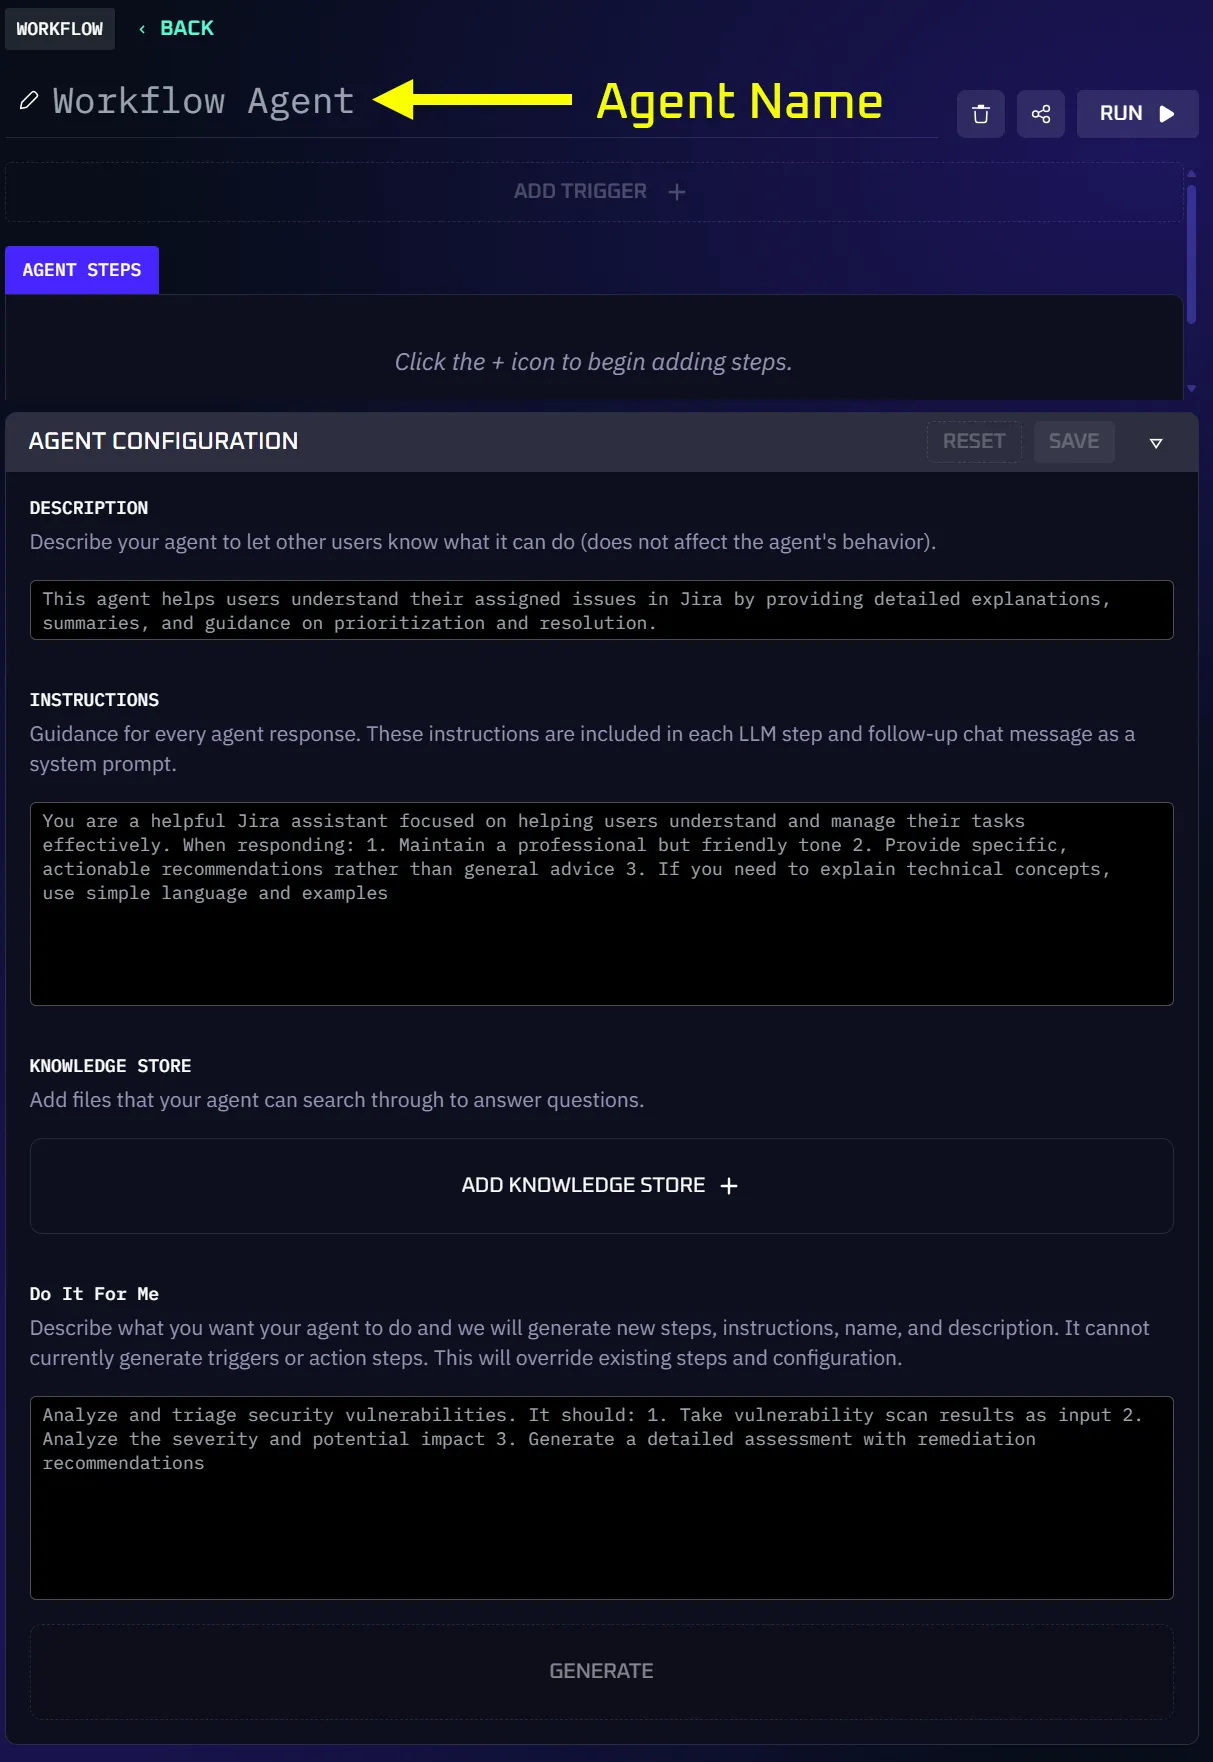
The Agent Configuration panel lets you describe what you want using natural language:
For detailed agent creation instructions, see Creating Agents.
Settings
Access settings via the gear icon in the top right:
- Models — View and manage available LLMs
- Integrations — Connect to third-party applications
- Security — Manage access controls and DLP
- API — View API keys and available models
- Secrets Vault — Manage stored secrets
Next Steps
- Create your first agent to automate a workflow
- Configure integrations to connect your existing tools
- Set up security controls to manage access and DLP